Use R2 as static asset storage for your Pages app
This tutorial will teach you how to use R2 as a static asset bucket for your Pages app. This is especially helpful if you’re hitting the file limit or the max file size limit on Pages.
To illustrate how this is done, we will build a simple hello-world app with Hono, and host its static assets (such as images and JavaScript libraries) in an R2 bucket.
Create an R2 bucket
Begin by creating an R2 bucket to store the static assets. A new bucket can be created through the dashboard or via Wrangler.
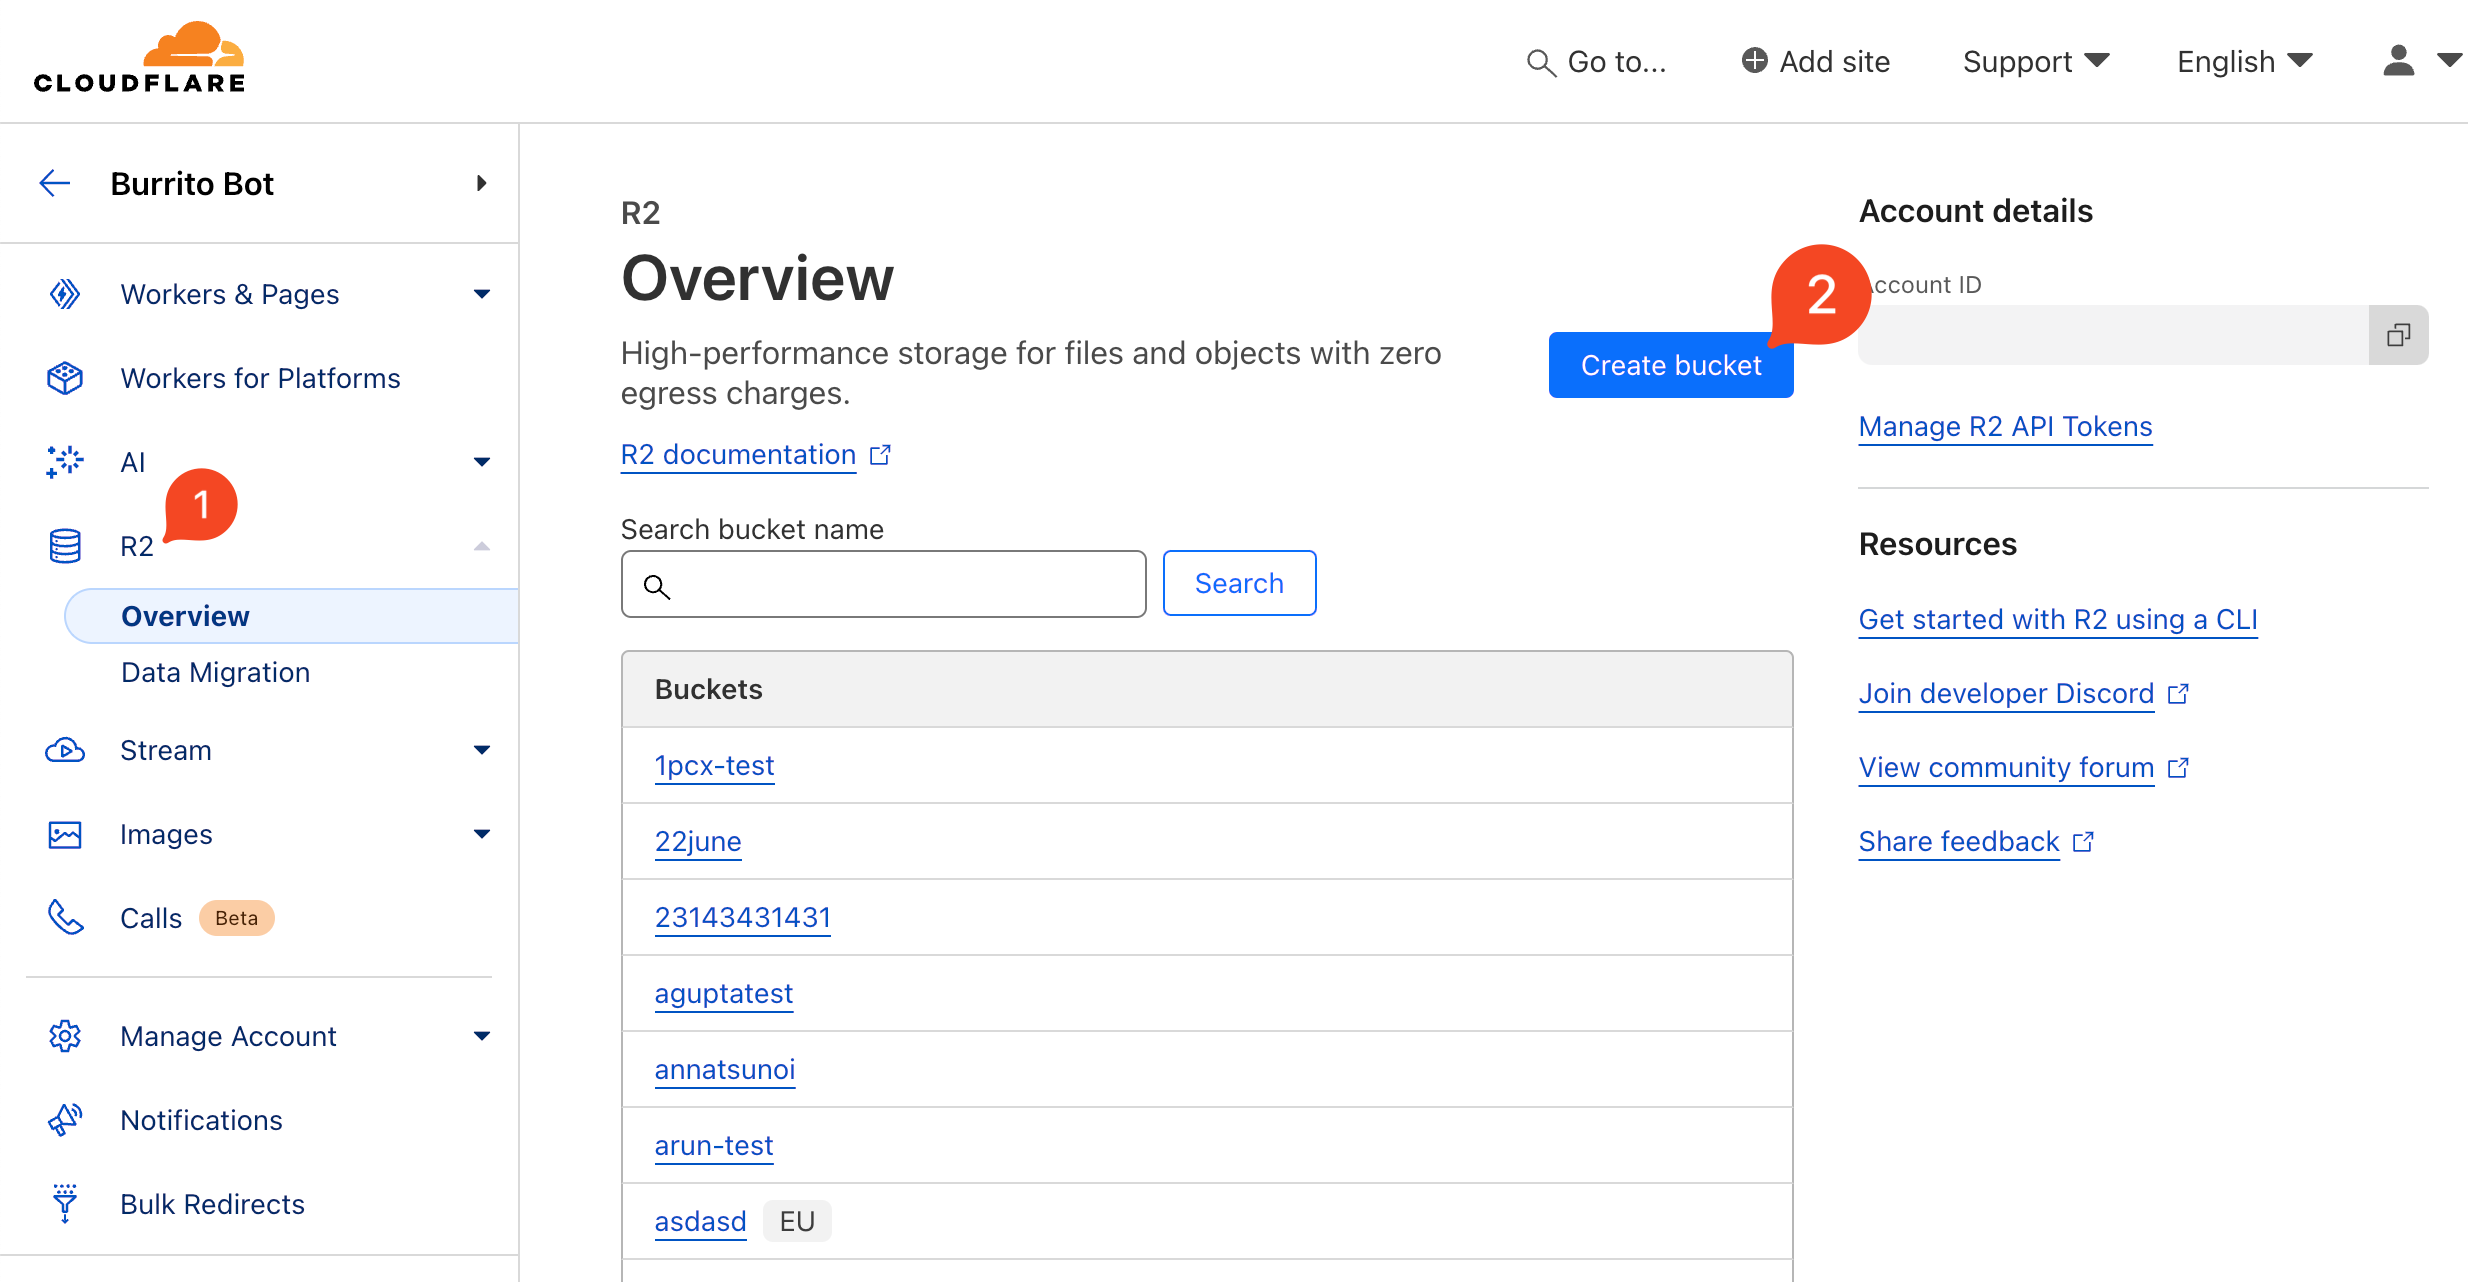
On the dashboard, navigate to the R2 tab using the side bar, click on Create bucket and give your bucket a descriptive name (i.e static-assets).
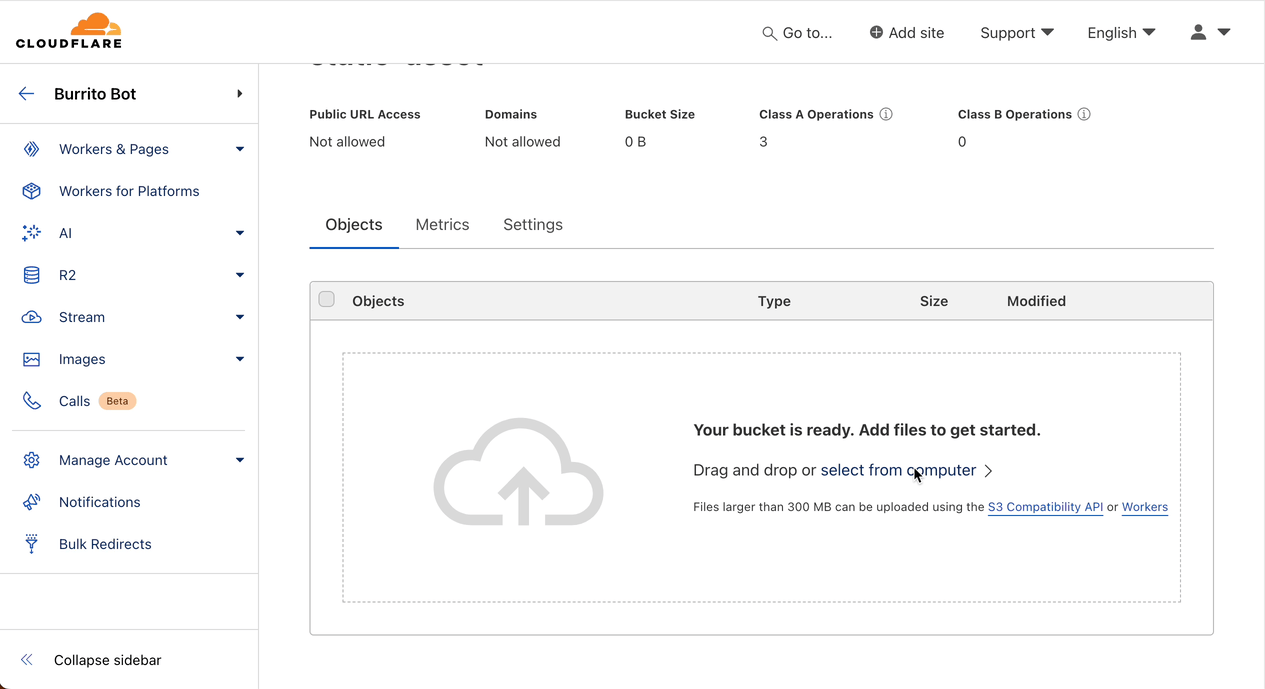
After creating a bucket, you can drag and drop files or folders from your computer into it. In the example below, I upload the Confetti JS library and a folder of cat images from Unsplash:
Alternatively, an R2 bucket can be created from the command line with Wrangler by running:
$ npx wrangler r2 bucket create <bucket_name>
# i.e
# npx wrangler r2 bucket create static-assets
And the required files or folders can be uploaded with the command:
$ npx wrangler r2 object put <bucket_name>/<file_name> -f <path_to_file>
# i.e
# npx wrangler r2 object put static-assets/confetti.js -f ~/Downloads/confetti.js
Create a Pages app
To create a Pages app with Hono, open a terminal window and run the following command. Select cloudflare-pages to use the Pages starter template, and then answer the prompts:
$ npm create hono@latest <app_name>
# i.e
# npm create hono@latest my-app
In the project folder, open wrangler.toml and add a binding to the R2 bucket created earlier. The bucket_name should be the exact name of the bucket you created in the previous section, while binding is a custom name to refer to the resource:
[[r2_buckets]]
binding = "STATIC_ASSETS"
bucket_name = "static-assets"
Next, open index.tsx and add a type definition for the R2 bucket binding. Then, add an assets route to fetch and return a given asset from R2. And finally, modify the rendered HTML to return an image and a script fetched from the R2 bucket:
index.tsximport { Hono } from "hono";
import { renderer } from "./renderer";
type Bindings = { STATIC_ASSETS: R2Bucket;
};
const app = new Hono<{ Bindings: Bindings }>();
app.use(renderer);
app.get("/assets/*", async (c) => { const path = c.req.path.replace("/assets/", ""); const asset = await c.env.STATIC_ASSETS.get(path); if (!asset) return new Response(null, { status: 404 }); return new Response(asset.body);
});
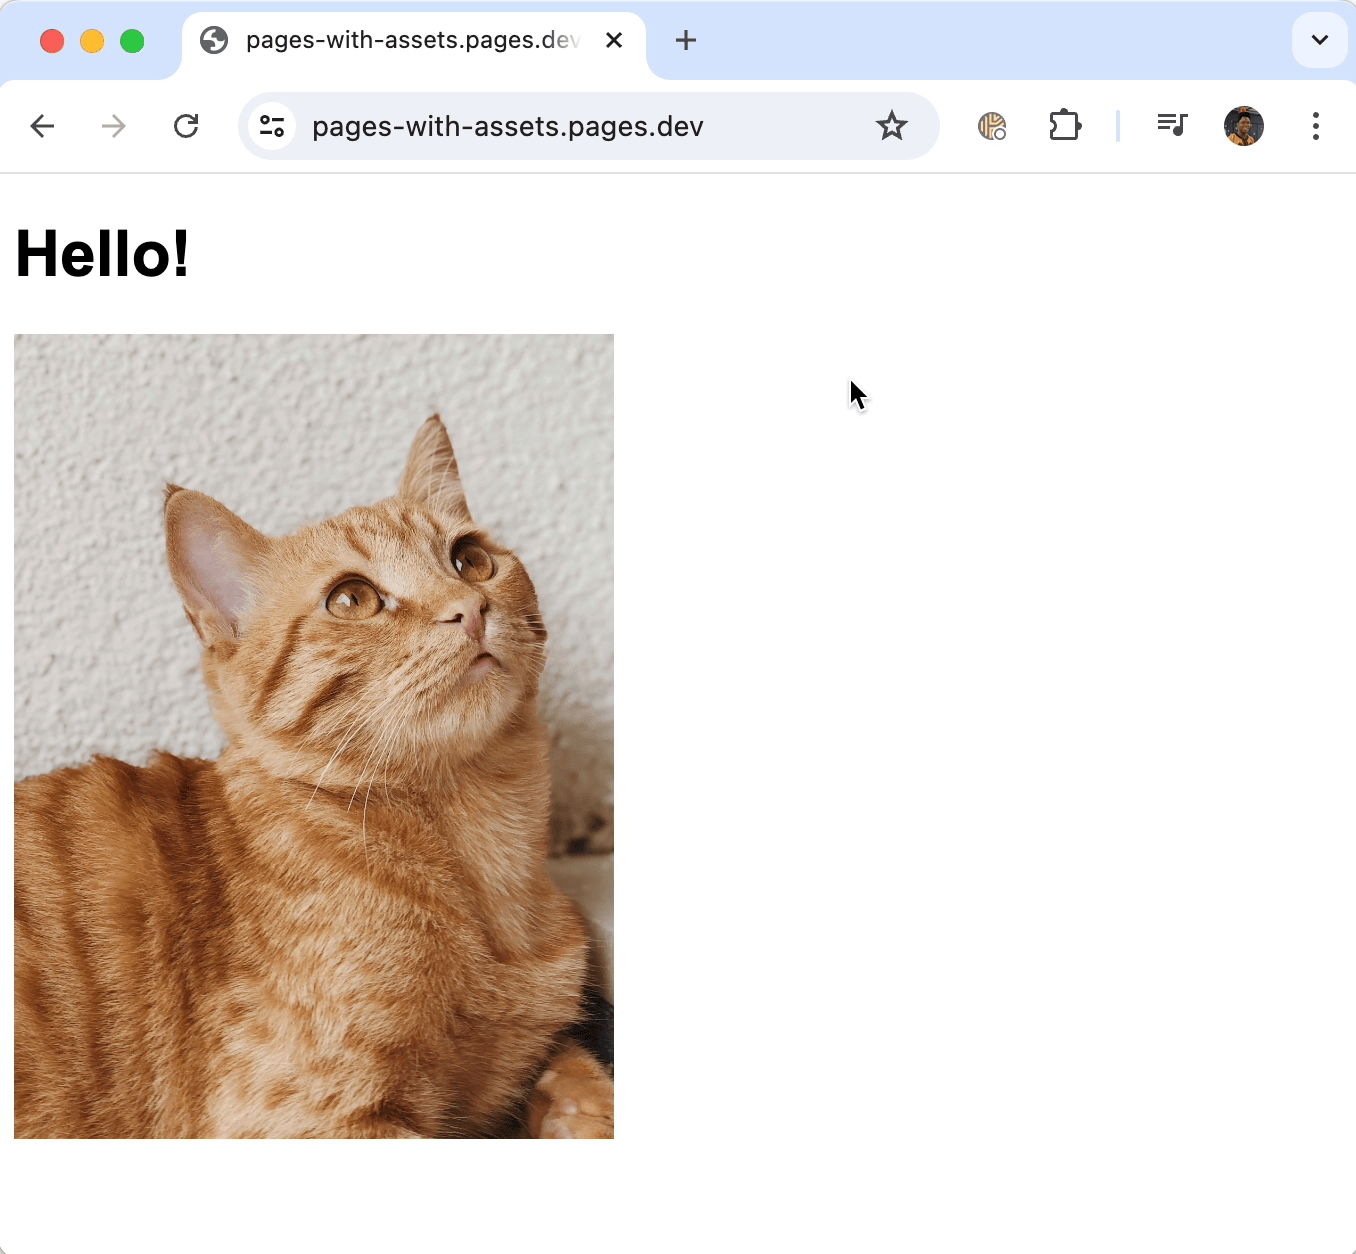
app.get("/", (c) => { return c.render( <> <h1>Hello!</h1> <img src="/assets/images/cat1.jpg" width="300" /> <script src="/assets/confetti.js"></script> <script>setTimeout(confetti, 500);</script> </>, );
});
export default app;
Deploy your app
After saving index.tsx , open a new terminal window and run:
$ npm run deploy
Once deployed, your Pages app can pull and serve content from your R2 bucket.